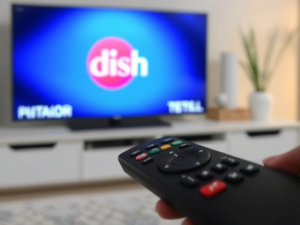
DISH remotes are essential tools for controlling your TV, satellite receiver, and other entertainment devices. Whether you have a new DISH remote model or an older version, programming it correctly ensures a seamless viewing experience.
This comprehensive guide provides detailed step-by-step processes to program and troubleshoot your DISH remote while offering solutions to common issues and advanced tips for optimal performance.
How to Identify Your DISH Remote Model
Before programming your DISH remote, it’s crucial to identify its model correctly. The newer models include 40.0, 50.0, 52.0, and 54.0, while the older models belong to the 20 and 21 series. Each model has distinct features and programming methods, making proper identification essential for a successful setup.
To identify your remote model:
- Check the remote’s back panel for model information
- Compare it with images on the DISH website
- Consult your user manual or original packaging
- Look for distinctive features like voice control or backlit buttons
How to Program Newer DISH Remote Controls

If you own a newer DISH remote (models 40.0, 50.0, 52.0, or 54.0), follow these comprehensive steps:
Initial Setup Process
- Press the Home Button:
- For most models: Press the Home button twice
- For model 40.0: Press the Menu button once instead
- Wait for the main menu to appear on your screen
- Access Settings:
- Navigate to Settings using the arrow keys
- Ensure you’re in the correct menu by checking the header
- Look for the gear or settings icon
- Select Remote Control:
- Choose the Remote Control option from the settings menu
- You may need to scroll down to find this option
- Some models might label it as “Remote Settings”
Device Pairing Process
- Choose the Device to Pair:
- Select the specific device you want to program
- Options typically include a TV, DVD player, audio receiver, or other compatible devices
- Make sure the device is powered on during this process
- Use the Pairing Wizard:
- The wizard will guide you through available pairing codes
- Follow on-screen instructions carefully
- Keep the remote pointed at the device during the entire process
- Test the Codes:
- Try each suggested code systematically
- Press the Volume or Power buttons to test the functionality
- Note which codes work partially or fully
- Confirm Successful Pairing:
- Select “Finish” when you find a working code
- Document the successful code for future reference
- Verify all essential functions work correctly
- Final Testing:
- Test all major functions: volume, power, input selection
- Verify special features like mute and channel control
- Ensure the remote responds consistently from different angles and distances
How to Program Older DISH Remote Controls
Older DISH remotes (20 and 21 series) use a power scan method, which requires more manual intervention:
Power Scan Setup
- Point the Remote:
- Aim directly at the device you want to control
- Maintain a clear line of sight
- Remove any obstacles between the remote and the device
- Press and Hold the Device Button:
- Hold the appropriate button (TV, DVD, or AUX) for 10 seconds
- Wait until all Mode buttons illuminate
- Keep the remote steady during this process
- Complete the Programming:
- Release the button when it blinks
- Press the Power button to initiate programming mode
- Use the Up button to cycle through available codes
- Stop when the device powers off
- Press # to store the successful code
Common Issues and Solutions
- Volume Control Problems:
- Verify TV button activation
- Check audio device programming
- Ensure correct input selection
- Test different code combinations
- Remote Responsiveness Issues:
- Replace batteries with high-quality alternatives
- Clear signal path obstructions
- Check for interference from other devices
- Verify proper distance and angle
- Connection Problems:
- Re-link using SAT > System Info > SAT sequence
- Reset remote to factory settings
- Update receiver firmware if necessary
- Check for physical damage
Maintenance and Care
To extend your remote’s lifespan:
- Clean regularly with appropriate materials
- Store in a safe, dry location
- Replace batteries preventively
- Avoid extreme temperatures
- Protect from physical impacts
Replacement Options and Support
Warranty Coverage
DISH provides various support options:
- Free replacements for defective units under warranty
- Discounted replacements for out-of-warranty devices
- Express shipping options for urgent needs
- Technical support during the replacement process
Ordering Process
To obtain a replacement:
- Contact DISH customer service (1-800-333-3474)
- Verify account information
- Describe the issue in detail
- Follow shipping instructions carefully
Additional Features and Tips

Voice Control Integration
Many newer DISH remote models include voice control capabilities:
- Activate voice commands through the designated button
- Use clear, natural speech patterns
- Learn common voice command phrases
- Customize voice control settings
Power-Saving Features
Maximize battery life with these practices:
- Enable auto-sleep mode
- Use backlight only when necessary
- Remove batteries during long periods of disuse
- Monitor battery indicator regularly
Conclusion
Programming your DISH remote correctly ensures optimal performance and convenience. This comprehensive guide covers everything from basic setup to advanced troubleshooting, helping you maintain full control of your entertainment system. Remember to keep this guide handy for future reference and contact DISH support for additional assistance when needed.
Frequently Asked Questions:
What is the most common location for the Menu button on a DISH remote control?
The Menu button is typically located near the top of DISH remotes, often colored in blue and marked with “MENU” text. On newer models, it’s usually found above the directional pad.
Why can’t I find the Menu button on my DISH remote?
Sometimes the Menu button may be labeled differently on older DISH remote models, or it might be hidden under a slide-down panel. Some remotes use a Home button instead of a Menu button for accessing the main interface.
What do I do if my DISH remote doesn’t have a visible Menu button?
If you can’t locate a Menu button, try pressing the Home or DISH buttons, as these often serve the same function. You can also consult your remote’s user manual or look up your specific model number online.
Can a universal remote control’s Menu button work with DISH?
Yes, most universal remotes can be programmed to work with DISH receivers, including the Menu function. However, you’ll need to properly program the remote using DISH-specific codes first.
How can I access the menu if my remote’s Menu button is broken?
If your remote’s Menu button isn’t working, you can typically access the menu through the physical buttons on your DISH receiver. Alternatively, you can use the DISH mobile app as a remote control replacement.
I am Ali, an experienced SEO specialist, content writer, and blogger with 5 years of expertise in crafting engaging and optimized content. Passionate about delivering impactful results, Ali specializes in driving organic traffic and creating content strategies that resonate with diverse audiences.